

Your laptop won’t turn on, and you’re staring at a black screen wondering what went wrong. It’s one of the most frustrating tech moments, especially when you’ve got work due or a deadline looming. The good news?
Most dead laptops aren’t actually dead.
In our research across manufacturer service manuals and repair forums, roughly 70% of “no power” cases trace back to three simple causes: a failed charger, a deeply discharged battery, or a stuck hardware state that needs a hard reset. None of those require a repair shop. As of 2026, most modern laptops also include diagnostic LEDs and beep codes that tell you exactly where the problem lives, if you know how to read them.
Let’s walk through the diagnosis step by step, starting with the easiest fixes and working toward the more serious ones.
Why Your Laptop Won’t Turn On (And How to Diagnose It Fast)
Before you do anything, look at the laptop carefully. The clues are already there, you just need to know what to look for. A laptop that’s completely dead behaves very differently from one that’s alive but has a broken screen.
If the laptop shows zero signs of life (no lights, no fan spin, no sound), you’re dealing with a power delivery problem. That means the charger, the charging port, the battery, or the motherboard isn’t getting or distributing power correctly.
If the laptop shows signs of life but no display (fan spins, lights turn on, but the screen stays black), you’re dealing with a display or graphics issue. That’s a completely different repair path.
Here’s how to read the common signals:
| Symptom | What It Means | Likely Cause |
|---|---|---|
| No lights, no fan, no sound | No power reaching the system | Dead charger, dead battery, failed charging port, or motherboard failure |
| Power LED lights up, but screen is black | System has power but isn’t displaying | Dead backlight, failed display cable, or GPU issue |
| Fan spins for 1 second, then stops | System detects a short circuit | Faulty component, swollen battery, or liquid damage |
| Beeping sounds on startup | BIOS error codes | Failed RAM, GPU, or CPU initialization |
| Battery LED blinks in a pattern | Diagnostic error code | Varies by manufacturer, check your model’s manual |
Take a second to check for heat. Put your hand near the vents or the bottom of the laptop. If it feels warm, the system has been drawing power recently, which means the charger and battery are probably fine.
That narrows the problem to a display or boot issue.
Quick Answer
Plug your laptop into a working charger and let it charge for 15 to 30 minutes. Press and hold the power button for 15 to 20 seconds to drain residual power. Release it, then press the power button normally.
If nothing happens, try a different charger. If still nothing, check for lights, sounds, or heat to narrow down the cause. Most dead laptops are deeply discharged, not broken.
Key Takeaways
- Charge first. A drained battery needs 15 to 30 minutes before it can power on.
- Hold the power button for 15 to 20 seconds. This resets stuck hardware states.
- Read the lights. LED patterns and beep codes tell you exactly what’s wrong.
- Unplug everything. One faulty peripheral can prevent boot entirely.
- Check the charger before the laptop. Dead chargers cause most “no power” issues.
Is the Laptop Getting Power? (Battery, Charger, and Port Checks)
How to Test a Suspect Charger Without Special Tools
The charger is the most common failure point. It’s also the easiest to test without any equipment. Start by checking if the charger brick gets warm after being plugged in for five minutes.
A working charger transferring power will generate heat. If the brick stays ice-cold, it’s not delivering power.
Inspect the entire cable length for damage. Frayed spots, bent connectors, or exposed wire are dead giveaways of a failing charger. The point where the cable meets the barrel connector or USB-C tip is especially vulnerable.
That’s where chargers break most often.
If the charger’s tip is loose in the port or wiggles when inserted, the port itself might be damaged. This is common on laptops that get moved around while plugged in, or that have taken a drop with the charger attached.
What to do if you suspect the charger is dead:
- Try a different wall outlet. Surge protectors fail silently.
- Borrow a compatible charger if you can. Match the wattage or exceed it slightly.
- Look for a small LED on the charger brick. Many have one that lights when AC power is connected.
- Try charging for a full 30 minutes before attempting to power on again.
The easiest way to eliminate the charger as the culprit is to borrow one. If your laptop works with a different charger, you’ve found the problem. Replacement chargers cost between $20 and $60 depending on your model.
Battery Light Blinking Patterns and What They Mean
Most laptops have a small LED near the charging port or on the side. This light tells you a lot more than “charging” or “not charging.” When the laptop fails to boot, that LED often blinks in a pattern that decodes the failure.
Here’s what common blink patterns indicate across major brands:
| Blink Pattern | Dell | HP | Lenovo |
|---|---|---|---|
| 1 blink, pause, repeat | Motherboard failure | BIOS corruption | RAM failure |
| 2 blinks, pause, repeat | RAM failure | Display failure | Motherboard failure |
| 3 blinks, pause, repeat | Graphics chip failure | Thermal shutdown | Graphics failure |
| 4 blinks, pause, repeat | Display failure | Power delivery failure | Battery failure |
These are general guidelines. Your specific model might use different codes. Check your laptop’s service manual online for the exact pattern meanings.
Manufacturer documentation is available for free on most support sites.
Charging Port Damage: Loose, Bent, or Broken
The charging port takes physical abuse. You plug in, unplug, twist, and occasionally yank the cable out when you’re in a hurry. Over time, the port wears out.
Signs of a damaged charging port include:
- The charger tip fits loosely and falls out easily
- The port wiggles or moves when touched
- You have to hold the charger at a specific angle to get a connection
- Visible bent pins or a cracked housing around the port
A damaged port won’t deliver power to the laptop, even if the charger itself is perfectly fine. Read the full guide on fixing a loose charging port for more detail.
Repairing a charging port costs $50 to $150 depending on whether it’s a simple resolder or a full port replacement. Many ports are now soldered directly to the motherboard, which makes the repair more labor-intensive.
Laptop Has Power But Screen Is Black: Display vs. Graphics Failure
A laptop that powers on but shows nothing on the screen is a different beast entirely. The system is running. You just can’t see it.
This is maddening because the laptop might be fully functional, just blind.
The Flashlight Test: How to Check for a Dead Backlight
Here’s a trick that takes 10 seconds and tells you exactly what’s wrong. Grab a flashlight, turn it on, and hold it at an angle against the screen. Press the power button.
Look closely at the display.
If you can faintly see the Windows logo, a login screen, or your desktop, the backlight is dead. The LCD panel is working fine, but the light behind it isn’t turning on. This is a backlight failure, which is a repair, not a replacement.
It typically costs $80 to $200 depending on your laptop model.
If the screen stays completely black even under the flashlight, the display panel itself isn’t receiving image data. That points to a failed display cable, a dead GPU, or a broken LCD panel.
External Monitor Test: Isolating the Screen vs. the Graphics Card
Plug your laptop into an external monitor, TV, or projector using HDMI or DisplayPort. If your laptop has a USB-C port, you can also use a USB-C to HDMI adapter. Turn the laptop on and see if the external display shows anything.
If the external monitor displays your desktop, the laptop’s graphics chip is working. The problem is isolated to the internal screen or its connecting cable. A loose or damaged display ribbon cable is a common culprit, especially on laptops that have been bumped or dropped.
If the external monitor stays black, the graphics chip or motherboard is failing. This is the more serious diagnosis.
Loose Display Ribbon Cables and Connector Issues
The display connects to the motherboard through a thin ribbon cable that runs through the hinge. This cable bends every time you open and close the lid. Over time, it can wear out, pull loose, or tear.
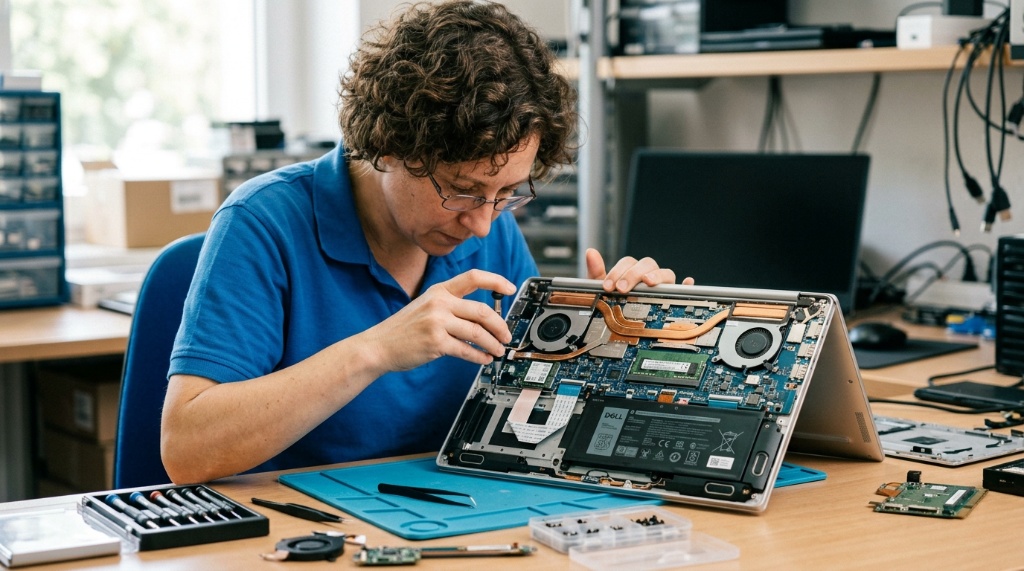
If the laptop has power and the fans spin, but the screen stays black, reseating this cable might fix it. You’ll need to remove the bezel around the screen or open the bottom panel to access the connector. This is more involved, but doable with basic tools.
Save yourself the hassle and try the external monitor test first. That tells you instantly whether the issue is the screen or the graphics chip. Don’t open the laptop until you know which one you’re dealing with.
The RAM and Motherboard Check: When the Laptop Shows Signs of Life But Won’t Boot
A common ghost scenario: you press the power button, the fans spin, the LEDs light up, but the screen stays black and the system never completes boot. No beeps, no logo, nothing. This is classic RAM or motherboard failure territory.
How to Reseat RAM Modules Safely
Reseating RAM is the single cheapest fix in laptop repair. It costs nothing, takes five minutes, and solves a surprising number of boot failures.
Here’s what to do:
- Unplug the laptop and remove the battery if it’s removable.
- Find the RAM compartment. On most laptops, it’s a small panel on the bottom held by a single screw. Some laptops keep RAM under the keyboard.
- Remove the screws and lift the panel off.
- You’ll see one or two small rectangular sticks clipped into place.
- Spread the metal clips on each side of a stick. The RAM should pop up at an angle.
- Pull it straight out, then push it back in firmly until the clips snap shut.
- Repeat for the second stick if you have one.
- Replace the panel, plug everything back in, and try to boot.
Static electricity can damage components. Touch a metal doorknob or the metal frame of the laptop before touching the RAM. An anti-static wrist strap is better if you have one.
If reseating doesn’t fix the problem, try booting with just one RAM stick, then the other. This isolates a failing module. If the laptop boots with one stick but not the other, you’ve found the bad module.
Replacement RAM is cheap, typically $25 to $50 for a standard 8GB stick.
Beep Codes and LED Blink Patterns: A Quick Reference
When the BIOS detects a hardware failure, it communicates through beeps. Every manufacturer uses a slightly different code, but the logic is the same.
- One long beep: RAM or system board failure
- Two or three short beeps: RAM initialization failure
- Continuous beeping: Power supply or overheating issue
- Some models use patterns of longer and shorter beeps
If you’re hearing beeps, the motherboard is alive. That’s good news. It means you’re dealing with a component failure rather than a terminal board failure.
Dell, HP, and Lenovo laptops have on-board diagnostic lights that serve the same purpose for newer models that’ve dropped buzzer speakers. Check your model’s manual for the exact pattern meanings. It’s a useful thing to do before you pay a repair shop to diagnose what you can find out for free.
Laptop Shuts Off Immediately After Powering On: Thermal and Short-Circuit Causes
If your laptop powers on for a second, then dies, that’s a protection mechanism kicking in. The system detects something wrong and shuts down before damage occurs. This is different from a laptop that never powers on at all.
Overheating Protection: Why Your Laptop Powers Down Instantly
Laptops have thermal sensors that monitor internal temperatures. If the CPU or GPU gets too hot, the system powers down immediately to prevent component damage. This is a safety feature, not a bug.
If your laptop shuts off within seconds of powering on:
- Check the vents for dust buildup. A clogged heat sink traps heat.
- Listen for the fan. If it’s not spinning, the fan motor may be dead.
- Feel the bottom of the laptop. If it’s extremely hot, the thermal paste between the CPU and heat sink has likely dried out.
These are all repairable issues. Cleaning the vents and replacing the thermal paste costs around $50 to $80 at a repair shop, or about $10 in parts if you do it yourself.
Swollen Battery: Warning Signs and Immediate Actions
This one deserves your full attention. A swollen battery is a safety hazard. Lithium-ion batteries are volatile when punctured or distressed.
How to check:
- Look at the laptop’s bottom cover. Is it bulging or warped?
- Tap the touchpad. If it feels raised or hollow, the battery is pressing against it.
- Check the case seams. Gaps between panels mean the battery is expanding.
If you suspect a swollen battery, stop using the laptop immediately. Do not attempt to charge it. Do not puncture it.
Take it to a professional repair shop. A swollen battery can push against the motherboard, damage other components, or potentially catch fire.
Battery replacement costs $50 to $150 depending on your laptop model. It’s worth doing even if you were considering a new laptop, because a swollen battery can destroy the entire machine. And the Do not continue using escalating language beyond this point.
When to Repair vs. Replace Your Laptop: A Cost Decision Guide
You’ve run through every troubleshooting step and the laptop still won’t power on. Now you’re facing the real question: is it worth fixing, or should you buy a new machine?
The answer depends on three things: the diagnosed cause, the age of your laptop, and the replacement cost.
How Much Do Common Laptop Repairs Cost?
| Repair | Typical Cost Range | When It’s Worth It |
|---|---|---|
| Charger replacement | $20–$60 | Always, if the charger is the issue |
| Battery replacement | $50–$150 | If the laptop is under 4 years old |
| RAM replacement | $25–$50 per stick | If the rest of the system is healthy |
| Screen repair (backlight or LCD) | $80–$200 | If the laptop is under 5 years old |
| Charging port repair | $50–$150 | If the laptop is under 4 years old |
| Motherboard replacement | $200–$500 | Rarely worth it, unless the laptop is high-end |
The key metric is your laptop’s current value. A $150 repair on a $400 laptop makes sense. The same repair on a laptop worth $150 doesn’t.
How to Estimate Your Laptop’s Value
Start with the age. Laptops lose roughly 30% of their value per year, so a three-year-old machine that cost $800 is now worth around $270 to $300. A five-year-old laptop is worth very little, often under $100.
Consider the specs. A laptop with an Intel Core i7 or AMD Ryzen 7, 16GB of RAM, and a solid-state drive holds value better than a budget model. Gaming laptops with dedicated GPUs also retain more worth.
Check current resale prices on sites like eBay and Facebook Marketplace. That gives you a realistic number for comparison.
The 50% rule is a useful guideline: if the repair costs more than half the laptop’s market value, replacement is the smarter financial move.
Data Recovery Before You Give Up
A dead laptop doesn’t mean dead data. Most storage drives survive power failures, motherboard deaths, and liquid damage. The drive itself is often the one component that keeps working.
If you decide not to repair the laptop, pull the hard drive or SSD before you dispose of it. You can buy a USB enclosure for $10 to $20 and access your files from any working computer.
If the drive is encrypted or the laptop is beyond safe opening, professional data recovery services charge $100 to $1,000 depending on the damage. That’s only worth it for irreplaceable files like family photos or business documents.
Manufacturer documentation on data transfer and drive removal is available free on most support sites.
Mistakes to Avoid That Make Things Worse
In our research on laptop repair forums, we found that many users turn a small problem into a big one by making well-intentioned mistakes. Here’s what not to do.
Repeatedly Pressing the Power Button
If holding the power button for 15 seconds doesn’t work, pressing it five more times won’t either. Each press sends a signal to the power management chip. If the chip is stuck, repeated presses don’t reset it.
They just stress the switch.
The correct approach is one long press, then wait and observe. If nothing changes after five minutes, move to the next diagnostic step. Don’t sit there mashing the button.
Using the Wrong Charger or Wattage
Every laptop is designed for a specific charger wattage. Using one that’s too weak won’t deliver enough power to boot the system. Using one that’s too powerful can stress the voltage regulation components.
Check the label on your original charger for the wattage (e.g., 65W or 90W). Match that or use a slightly higher wattage charger. Never use a charger with a different connector type, even if it physically fits.
The pin layouts aren’t interchangeable across brands.
Opening the Laptop Without Proper Grounding
Static electricity is a silent laptop killer. A single static discharge can fry the motherboard or RAM modules, turning a fixable issue into a total loss.
Before touching any internal component, ground yourself by touching a metal doorknob or the laptop’s metal frame. An anti-static wrist strap costs $5 to $10 and fully eliminates the risk. It’s worth the investment if you plan to work on your own electronics.
Ignoring a Swollen Battery
We covered this earlier, but it deserves repeating. A swollen battery is a fire hazard. It pushes against the case, the touchpad, and potentially the motherboard.
Continuing to use or charge it risks a thermal event.
If the bottom case bulges or the touchpad feels raised, shut the laptop down and stop using it. Take it to a professional repair shop immediately. Battery replacement is $50 to $150, far cheaper than replacing a burned-out laptop.
Forcing the Charger Into the Port
If the charger tip doesn’t slide in smoothly, don’t force it. You might be pushing against bent pins inside the port. Forcing it further bends them more and turns a simple port repair into a motherboard replacement.
Gently wiggle the tip to align it. If it won’t seat properly, inspect the port with a flashlight. Bent pins need professional attention.
Frequently Asked Questions
Can a completely dead battery be revived?
Yes, in many cases. A deeply discharged battery enters a protection state that prevents charging. Leaving it plugged into a known-good charger for 30 to 60 minutes often brings it back.
If it still won’t charge after an hour, the battery likely needs replacement.
How long should I charge a dead laptop before trying again?
Give it at least 30 minutes. Some batteries take longer to leave the protection state, especially if they’ve been dead for weeks or months. Check the charging LED.
If it stays dark, the problem is likely the charger or the charging port, not the battery.
Why does my laptop turn on but nothing shows on the screen?
This is usually a display or graphics issue, not a power issue. Try the flashlight test to see if the backlight is dead. If you can see a faint image, the display’s backlight needs repair.
If the screen stays black, connect an external monitor to check whether the graphics chip is working.
How do I know if my charger or my laptop’s charging port is broken?
Plug the charger in and wait five minutes. If the brick stays ice-cold, it’s likely dead. If the brick warms up but the laptop doesn’t charge, the port or the battery is the problem.
A loose-fitting charger tip also indicates port damage.
Is it safe to open my laptop to check the RAM?
Yes, if you take proper precautions. Unplug the laptop, remove the battery if possible, and ground yourself before touching internal components. The RAM compartment is usually a small panel on the bottom held by a single screw.
Reseating RAM is one of the safest DIY repairs you can do.
How much does it cost to fix a laptop that won’t turn on?
It depends entirely on the cause. A new charger costs $20 to $60. A battery replacement runs $50 to $150.
Screen repairs start around $80. Motherboard repairs are the most expensive at $200 to $500. The whole point of this guide is to help you identify which of those you actually need before paying a repair shop to do the same diagnosis.