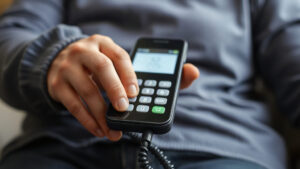

Watching a parent squint at a tiny Settings screen or accidentally hang up a call is frustrating for everyone involved. If you searched for iphone senior mode setup, you likely want one clear answer: how do I make this phone easier for an older adult to use? Apple does not sell a single switch called "Senior Mode," and that surprises many families.
Quick answer: You build a senior-friendly iPhone by combining several built-in settings: a larger text size, Bold Text, Display Zoom, AssistiveTouch or a simplified Home Screen, and a few safety features like Medical ID and Emergency SOS. The goal is fewer taps, bigger targets, and a layout that stays predictable from one day to the next.
This guide walks through each setting, shows where to find it, and explains which choices help most for common situations like poor eyesight, shaky hands, or memory loss. You will also learn which mistakes make the phone harder to use and how to avoid them.
What is iphone senior mode setup?
There is no menu item labeled "Senior Mode" on any iPhone. Instead, the term describes a deliberate configuration of standard iOS features so the device suits an older adult’s vision, hearing, dexterity, and comfort with technology. Think of it as a recipe rather than a product.
The core building blocks fall into four groups:
- Vision settings: Larger Text, Bold Text, Display Zoom, and Increase Contrast.
- Touch settings: AssistiveTouch, larger keyboard keys, and adjusted touch duration.
- Home Screen layout: Fewer apps, larger icons, and a simplified first page.
- Safety settings: Medical ID, Emergency SOS, Find My, and a trusted contact.
Apple groups most of these tools inside Settings under Accessibility. That area exists specifically for people who need the interface adapted, so nothing here is a workaround or a hack. Every option is supported and survives normal software updates.
What it typically looks like: A finished setup often has text at a size where a person can read a message without reading glasses, a Home Screen showing six to eight large icons, and a Lock Screen with a clear clock and one or two trusted contacts. The phone behaves the same way every time the user picks it up.
One useful way to think about the process is a comparison between a fresh iPhone and a configured one.
Comparison: Default setup vs. senior-optimized setup
| Feature | Default | Senior-optimized |
|---|---|---|
| Text size | Standard | Larger Text, often near maximum |
| Home Screen | Many apps and widgets | 6–8 large, familiar icons |
| Emergency access | Not configured | Medical ID and SOS enabled |
| App purchases | Unrestricted | Ask to Buy or Screen Time limits |
Notice that none of these changes require a new device. You can apply them to an iPhone already in use in about twenty minutes.
Worth knowing: the person’s needs often shift over time. Someone managing fine today may need larger text or a simpler screen in a year, so treat the configuration as something you revisit rather than finish. A short note of what you changed makes those future adjustments far quicker.
Two phones with identical hardware can feel completely different depending on these settings. The work is in the choices, not the purchase.
Why iphone senior mode setup matters
A poorly configured phone creates small daily failures. An older adult misses a call because the ringtone is too quiet, or taps the wrong icon because the buttons sit too close together. Each failure chips away at confidence, and eventually the phone stays in a drawer.
The practical benefits show up quickly:
- Fewer mis-taps. Larger text and spaced icons reduce accidental taps on the wrong app.
- Faster reading. Bold Text and Display Zoom help people who struggle with thin fonts.
- Better safety net. Medical ID lets first responders see conditions and contacts from the Lock Screen without unlocking the phone.
- Less family stress. A predictable layout means fewer panicked phone calls asking how to find the camera.
Consider a real scenario. A grandmother wants to video call her grandchildren but keeps opening the wrong app. After moving FaceTime to the first icon and hiding unused apps, she reaches her family with one tap. That small change preserves a meaningful routine.
There is also a well-being angle. Research on older adults and technology consistently points to the same pattern: confidence with a device predicts continued use far more than raw technical skill. When the interface stops fighting the user, the user keeps going.
A phone with every accessibility feature switched on can feel overwhelming. Choose the options that solve the actual problems this person has, and leave the rest alone.
The takeaway is straightforward: a thoughtful setup protects independence. It keeps the phone useful for calls, messages, photos, and emergencies instead of letting it become a source of frustration.
It also reduces the risk of costly mistakes. A phone left with unrestricted purchases or unclear billing can rack up charges for in-app items, and a cluttered notification list makes scam texts harder to spot. A deliberate setup closes those gaps before they become a problem, giving the family one less thing to worry about.
Best practices
Good setups follow a few principles. Apply the settings in a sensible order, and test each one with the person who will use the phone.
Start with vision settings
Open Settings > Display & Brightness > Text Size and drag the slider toward the larger end. For even bigger text, use Settings > Accessibility > Display & Text Size > Larger Text and enable the larger sizes toggle. Turn on Bold Text at the same time. Then set Display Zoom to Zoomed under Display & Brightness, which enlarges the entire interface rather than just the letters.
Simplify the Home Screen
Remove apps the person never opens. Keep calls, messages, photos, and one or two favorites within easy reach. You can move rarely used apps into the App Library instead of deleting them. A short first page with large icons is easier to learn than a grid of thirty small ones.
Configure safety features
Set up Medical ID in the Health app so emergency information appears on the Lock Screen. Enable Emergency SOS and confirm the side-button shortcut works. Add the senior to Find My with a family member so the phone can be located if it is lost.
Adjust touch and keyboard behavior
For shaky hands, enable AssistiveTouch under Accessibility > Touch, which adds an on-screen button for common actions. You can also turn on Back Tap so a double-tap on the back of the phone opens a chosen feature. In Keyboard settings, the larger keys option appears automatically once text is enlarged.
Practice together, then step back
Walk through the most common tasks together: answering a call, sending a message, taking a photo. Let the person perform each action while you watch. Once it works, resist the urge to add more features. The setup is finished when it handles daily needs without confusion.
Keep a copy of the final layout. If the arrangement gets scrambled, you can restore it quickly.
Common mistakes to avoid
Most setup problems trace back to a handful of avoidable errors. Check this list before you hand the phone over.
Making every change at once. Fifteen changes in one session is hard to absorb. Introduce a few settings, let the person use the phone for a week, then adjust.
Setting text so large it breaks layouts. At the maximum size, some buttons and labels get cut off. Test key screens like Messages and the Phone app before settling on a size.
Removing the wrong apps. Deleting a banking or medication app can cause real trouble. Hide apps in the App Library instead, and confirm with the user before removing anything.
Forgetting the passcode. A forgotten passcode can lock the phone and, without a backup, wipe data during recovery. Write the passcode down and store it somewhere safe and agreed upon.
Skipping the safety setup. Medical ID and Emergency SOS take two minutes and matter more than cosmetic changes. Do them early.
Sharing the Apple ID. Give the senior their own Apple ID. Sharing one with a family member causes message mix-ups, contact confusion, and photo sync problems.
Assuming the person is helpless. Ask before making changes. An older adult who chooses their own layout is far more likely to remember and use it.
Hiding Settings instead of explaining it. Locking the user out of Settings with Screen Time prevents accidental changes, but it also leaves the person unable to adjust volume or connect to Wi-Fi. If you restrict access, show them where the relevant controls live, or agree on who to call for help.
Ignoring the case and charger. A thick case can make side buttons hard to press, and a stiff charging cable becomes a daily struggle. Test the buttons with the case on and choose a magnetic charger if plugging in a cable causes frustration.
Failed passcode attempts can disable an iPhone. If the user struggles with codes, consider a longer, memorable passcode or a trusted family member who can help with recovery, and keep an iCloud backup running.
FAQ
Does iPhone have a built-in senior mode?
No. Apple does not offer a single senior mode switch. The equivalent is a collection of Accessibility settings, Display Zoom, and a simplified Home Screen. You configure them yourself, and the result works like a dedicated mode.
Will these settings change with iOS updates?
Most accessibility settings persist across updates, but a major iOS release can occasionally reset a preference or move a menu. Check the key settings after each big update and restore anything that changed.
Is AssistiveTouch necessary for someone with shaky hands?
It helps many people, but it is not required. Try larger touch targets and Back Tap first. Add AssistiveTouch only if mis-taps continue, since the floating button can itself become a distraction.
Can I set up a senior’s phone remotely?
Not directly. Someone needs physical access to enter a passcode and adjust settings. You can guide the process over a call, or prepare the phone before giving it to the user, then fine-tune during a visit.
Does a simplified setup limit emergency access?
No. Medical ID and Emergency SOS stay available from the Lock Screen. A simple layout actually makes emergency features easier to reach, because the person is not hunting through a crowded screen.
Conclusion
A good iphone senior mode setup comes down to a handful of decisions: readable text, a short Home Screen, working safety features, and settings that match this specific person’s needs. Skip the kitchen-sink approach, test each change with the user, and keep a record of the passcode and final layout.
Your next step is simple. Sit down with the phone and the person who will use it, enable Larger Text and Bold Text, and move the four most-used apps to the first screen. That twenty-minute session will do more for daily confidence than any single feature, and you can refine everything else after they have tried it for a week.